Showing posts with label Chicken. Show all posts

Sunday, February 14, 2016

Chicken Rolls


Oh, Chicken Rolls, how we love thee!  This is one of those recipes that I know my children will all ask for when they grow up so that they can make it for their families.  Even my two picky little eaters inhale these babies.  I knew that I most definitely had to include it in my recipe book.  They are very simple and easy to make but taste amazing!  And just so you know, they have to be served with mashed potatoes so that you can accidentally cover your chicken rolls in the gravy as well.  And so to my children, friends, strangers and future generations of Chicken Roll eaters, I say, "Enjoy"!

1 block cream cheese. softened
4 chicken breasts, cooked and shredded
2 cans crescent roll dough
4 TBS butter, melted
1/2 cup Italian seasoned bread crumbs

Preheat oven to 375 degrees.  In a mixing bowl, combine cream cheese and shredded chicken.  Stir until creamy and thoroughly mixed.  Open cans of crescent roll dough.  Remove dough from can, carefully unroll and separate triangles of dough.  Place a scoop of cream cheese and chicken mixture in the middle of a triangle.  Fold the two corners over the cream cheese scoop and then pull the third corner up over it and wrap it around the outside of the roll.  Pinch the edges of the dough together to seal in the cream cheese mix.  Dip roll in melted butter then bread crumbs.  Place on greased cookie sheet.  Repeat until all rolls are filled.  Bake in oven at 375 for 15 minutes.  Best if served with gravy drizzled on top.

Thursday, January 7, 2016

Chicken Enchiladas


There are so many Chicken Enchilada recipes out there.  After trying many different ones, this has become our family favorite!  We aren't a real spicy family, so this is very mild but full of flavor!  You can use a rotisserie chicken or shredded chicken that you prep ahead of time.  Either way, this beautiful dish is sure to be a crowd pleaser!

1 1/2Tbs olive oil
1/2 medium onion, diced
3 tsp minced garlic
1 1/2 teaspoon cumin
1/4 cup flour
2 cups chicken broth
1/3 cup cilantro leaves, chopped
2 1/2 lbs shredded chicken or 1 deli roasted rotisserie chicken, shredded
Salt and freshly ground black pepper
8-10 flour tortillas
8 oz Colby Jack cheese, shredded
2 cups salsa
Optional toppings: diced tomatoes, chopped lettuce, sliced olives and sour cream

Preheat oven to 350. Heat olive oil in a medium saucepan over medium heat. Add the onion and cook until soft and caramelized, about 5 to 7 minutes, stirring often. Add the garlic and cumin then cook for an additional minute. Sprinkle on the flour and stir while gradually whisking in the chicken stock. Continue whisking over a low simmer until smooth and thickened. Turn off the heat, add 1/2 cup salsa, fresh chopped cilantro then fold in the shredded chicken meat. Season to taste with salt and pepper. Take a large baking dish and smear the bottom with salsa. Take the flour tortillas and briefly flash them over the stove-top flame (or put them briefly under the broiler for about a minute if using an electric stove). Put a scoop of the shredded chicken-enchilada mix down the middle of a tortilla, followed by a sprinkle of the shredded cheese. Fold the tortilla over the filling and roll up. Place the tortillas in the baking dish, seam side down.  Drizzle with salsa and top with the remaining shredded cheese. Bake uncovered for about 30 minutes until bubbly and cracked on top. Garnish with sour cream, shredded lettuce, olives and tomatoes.


Source:  Whisked Away

Sunday, May 31, 2015

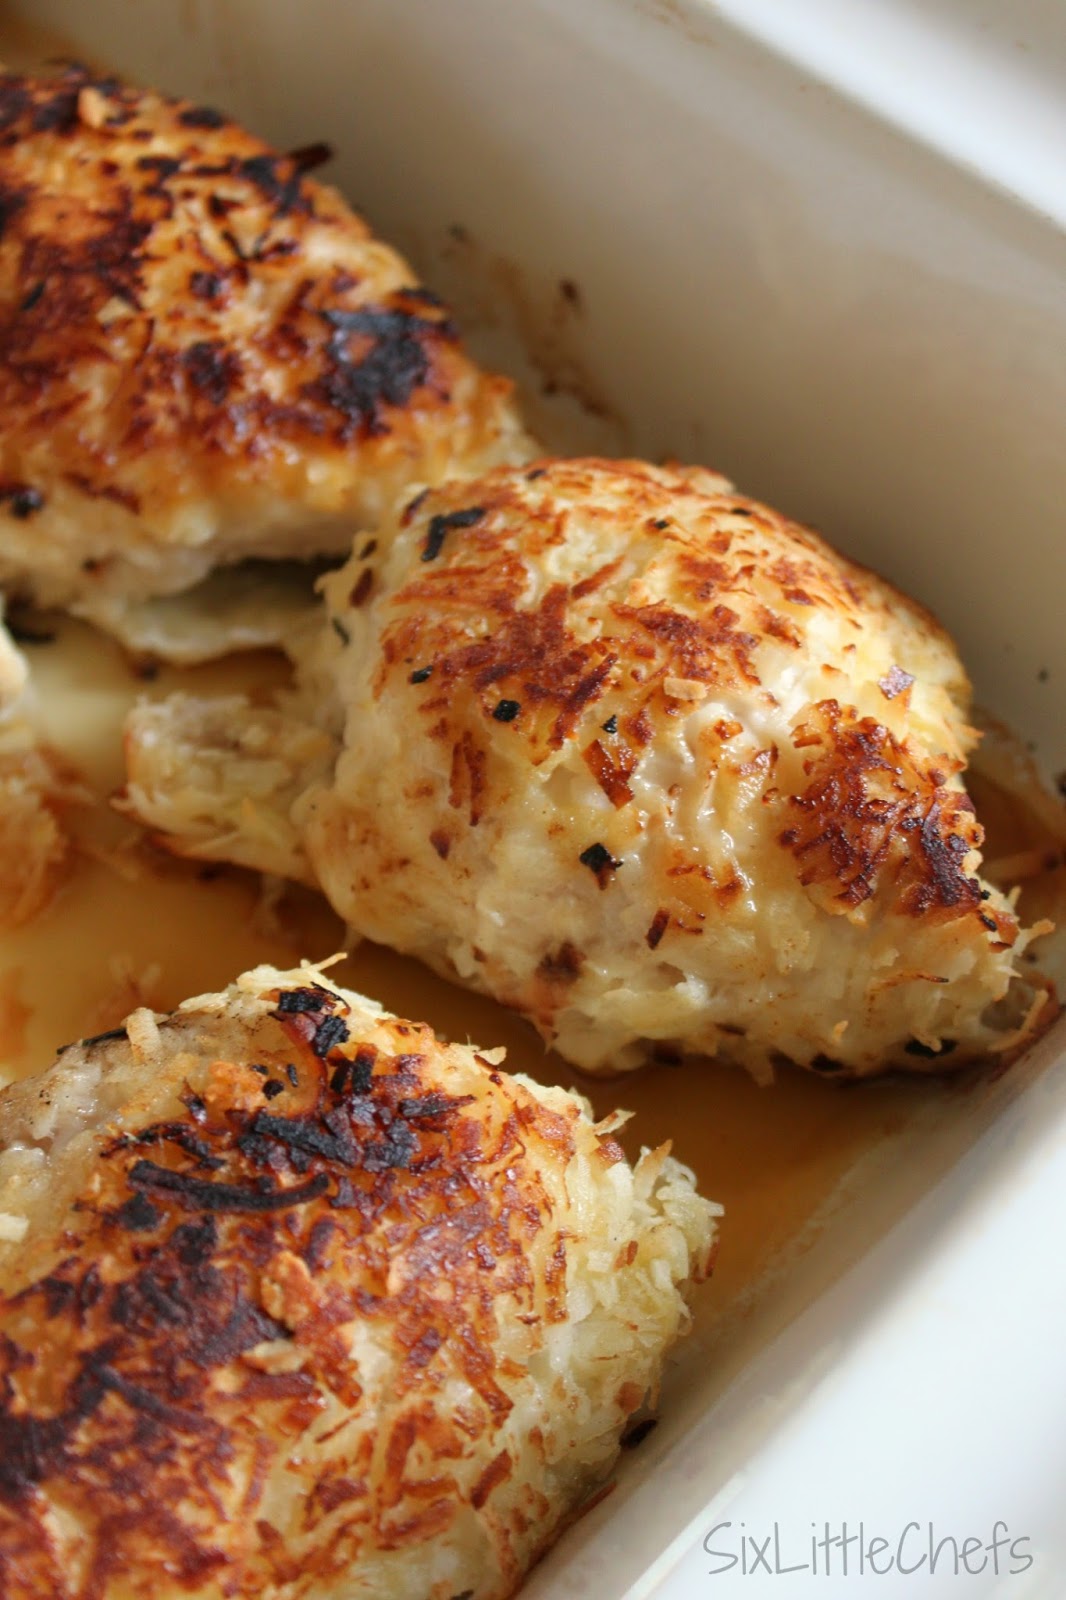
Coconut Crusted Chicken with Grilled Pineapple Salsa


For years I was not a coconut fan.  The thought of eating an Almond Joy candy bar made me feel the complete opposite of joy.  Coconut flavored things were okay, but the shredded coconut itself was a no go.  I think my taste buds have grown up a little and I recently realized that I'm kind of liking the shredded coconut thing.  When I came across this recipe it was screaming summer and I decided to give it a try.  I wasn't sure how well I'd like the chicken covered in shredded coconut but guess what, I LOVED it!  It's a little crispy and a little sweet and so delicious!  The Grilled Pineapple Salsa is fabulous and the perfect compliment to the chicken.  I don't think I'll ever be an Almond Joy fan but this chicken, I'm definitely a fan!

Dip the chicken in Flour, eggs and coconut flakes.  Place in a greased skillet over medium/high heat.  sed skillet over medium/high heat.  Cook chicken on each side until  golden brown . Be careful not to let the coconut burn.  Chicken will not be fully cooked yet.  


Place golden brown chicken in a greased casserole dish.  Bake at 375 for 30 minutes.


While chicken is baking, prepare the Pineapple Salsa.  Grill pineapple rings, pepper and green onions until they have some beautiful grill marks.  Remove from heat and sprinkle with sea salt.  


Let it cool for a few minutes.  Chop veggies into large chunks (except lemon) and toss together in a bowl.  Add lime juice, cilantro and salt and pepper to taste.  I think next time I will use a red bell pepper to add a little more color variety.


Serve Coconut Crusted Chicken with a generous scoop of pineapple salsa on top and a sprinkle of sliced almonds.  (I forgot to add the almonds until after I took pictures.  They are a great addition though!)


For the chicken
6 chicken breasts
1/2 cup flour
2 eggs, lightly scrambled
1 cup coconut flakes
sliced almonds, to garnish

Preheat oven to 375.  Season chicken breasts with salt and pepper.  Dip chicken in flour, eggs and coconut flakes.  Place in a greased skillet over medium/high heat.  Cook chicken on each side until  golden brown . Be careful not to let the coconut burn.  Chicken will not be fully cooked yet.  Place golden brown chicken in a greased casserole dish.  Bake at 375 for 30 minutes.  While chicken is baking, prepare the Pineapple Salsa below.

For the salsa
1 pineapple, cut into rings
1 green bell pepper (or jalapeno if you want to add a little spice)
4 green onions
juice from 1 lime
1 cup cilantro, chopped
sea salt and black pepper

Put pineapple rings, bell pepper and green onions on the grill.  Cook until grill marks are visible.  Remove from heat and sprinkle with sea salt.  Let it cool for a few minutes.  Chop veggies into large chunks (except lemon) and toss together in a bowl.  Add lime juice, cilantro and salt and pepper to taste.  Serve a generous scoop of salsa on top of Coconut Crusted Chicken with a sprinkle of sliced almonds

Source:  Barefoot Girl In The Kitchen

Friday, May 29, 2015

Tuscan Chicken Sandwich


I come from a large family and my siblings are kind of scattered around.  I wish we could all live in the same area, or at least the same state!  But alas, those silly jobs just seem to pull us all to and fro.  I've been lucky enough to live within a few hours of one of my brothers, Tyler, twice now!  We were in Iowa for grad school and our last two years there, he attended a medical school in Iowa.  Then we moved to Texas and a few years later he got into a residency program that was, you guessed it, in Texas.  I loved having some family close enough that we could get together for holidays and occasional visits!  I adore him and his cute wife Margaret as well as their two sweet kids!  Not only did we enjoy the time we got to spend together but as a bonus benefit, Margaret is an awesome cook!  Whenever we'd get together, there was always sure to be yummy food involved.  She recently sent me the recipe for these Tuscan Chicken Sandwiches that she made for us one time.  I was so excited to have them again!  When she sent me the recipe I had just done my grocery shopping for the week.  I added it to the following week's menu though.  Then I realized that we had a big camping trip planned that weekend.  I couldn't stand to put this off any longer so I decided to make them ahead of time and took them with us on our camping trip.  Let me tell you, they were every bit of fabulous that I remembered them to be!  The chicken and peppers are flavored so perfectly and the mayo/pesto spread is to die for!  It was a far cry from a weenie roast, though there was some of that too.  I've been eager to post this recipe on my blog and share it with the world.  I hesitated a little though because the pictures I took were, well on our camp out.  Nothing amazing.  I feel that it would be selfish of me to keep this recipe from the world any longer though, so I've decided to post it anyway.  Paper plate and all!  Cook it in the crock pot ahead of time and take it camping or serve it with a fancy salad on glass plates.  Casual or fancy, it's a fantastic sandwich that you've got to try!

For the chicken:
1 1/4 lbs chicken breast
2 garlic cloves, minced
1 red bell pepper, thinly sliced*
1/2 t salt

Combine all ingredients and place in crock pot.  Cook on low for 6-7 hours.  When cooked, remove from crock pot and shred chicken and red peppers.
*or you can use a jar of roasted red peppers

For the Mayo Spread:
1/4 c mayo
3 T pesto

In a small bowl, combine mayo and pesto.  Mix thoroughly.

For the Sandwiches:
shredded chicken and peppers (see above)
mayo spread (see above)
6 slices provolone cheese
6 tomato slices
6 ciabatta or other kind of rolls

Layer they bread, mayo, chicken, tomato, provolone cheese.  Make sure you add enough of the pesto sauce on the sandwich or it's just not as good!

Source:  Margaret Jolley

Saturday, May 23, 2015

Asian Chicken Pasta


I was surfing around pinterest for some new dinner ideas and found a really yummy looking asian pasta dish.  I added it to our weekly menu, put all the ingredients on my shopping list and was excited to give it a try.  On the night that I was planning to make it I couldn't find the recipe anywhere!  I thought I had pinned it but apparently I didn't and when I did a search on "Asian Pasta" a million different recipes came up.  I had ingredients for this specific recipe though and was determined to find that one.  I just happened to be talking on the phone with my sister Jamie in New Zealand (a rare treat!) as I was on my recipe quest.  I was on the brink of pinterest insanity when I finally told her about my dilemma.  She said that it sounded just like a recipe she has on her blog!  I know the recipe I had found earlier was on a different blog but she was right, her recipe had exactly the same ingredients I had bought.  Dinner was saved as well as my sanity.  Jamie is my hero for so many reasons and now I have one more reason to add to the list.  This beautiful Asian Chicken Pasta was everything I hoped it would be, and more.  I'm sure it will be saving dinner for many nights to come!

1-2 chicken breasts
1 Tbs vegetable oil
9 oz thin spaghetti pasta (whole grain, whole wheat or white)
3 green onions, chopped
1 c frozen peas
¾ c shredded carrots
¼ c fresh cilantro, chopped
½ cup salted peanuts
2 tsp minced fresh ginger, or 1 tsp powdered ginger
2 cloves garlic, minced
¼ c light soy sauce
¼ c rice vinegar
2 tsp sesame oil
2 Tbs fresh lime juice, or 1 Tbs lime juice from bottle
½ tsp pepper

Add pasta to a pot of boiling water and cook until al dente, then drain and set aside. Cut chicken breasts into cubes the saute with 1 Tbs vegetable oil in a large wok or skillet until cooked through. Add ginger, garlic, peas carrots and peanuts and cook for an additional 1-2 min. Mix soy sauce, rice vinegar, sesame oil, lime juice and pepper together in a separate bowl. Pour into skillet with the chicken then add the cooked pasta, green onions and cilantro, then stir fry until heated through and mixed evenly.

Source:  Whisked Away

Sunday, May 17, 2015

{Country Style} Rotisserie Chicken Pot Pie


It's that time of year when I'm mostly like, "Salads, BBQ's, watermelon and all things summer!", but every now and then I just need a yummy, indulge in that comfort food dish, kind of night.  And when that night creeps up, this right here fits the bill.  We are kind of a divided house when it comes to Chicken Pot Pie.  Well, we were before we found this recipe for it, but I'll get to that in a minute.  About half of my kids love the stuff.  Actually, love is probably an understatement.  I think my 15 year old son would eat it three meals a day, seven days a week.  For all of forever.  In fact, for April Fool's Day this year we had a little contest.  I told my kids that whoever won the Best Pranker title this year, I would make them their favorite treat.  He won and guess what he requested.  You guessed it, Chicken Pot Pie.  Because that's his favorite "treat".  On the other hand, we have some (including my husband) that aren't so thrilled about Chicken Pot Pie night.  They silently endure it, eating just enough to get by until everybody's in bed and they can sneak down to the kitchen for a bowl of cold cereal.  That's what one too many cheap frozen chicken pot pies in your youth can drive you to.  That is how things used to be.  I'm telling you, this recipe right here was a game changer.  They were choking down the homemade stuff but it was the cheaters version.  Canned mixed veggies, cream of chicken soup, the whole nine yards.  This recipe takes a little longer, but not much.  The end result is well worth the extra effort.  The first time I tried this version, I didn't tell anybody it was a different recipe than I usually use.  The haters had that, "here we go", look in their eyes as they geared up for the obligatory, peacekeeping bite.  After one bite their eyes lit up and they were all about the Chicken Pot Pie love!  "What is this?"  "This is so good!" "I love this!"  "Team Chicken Pot Pie forever!"  Okay, maybe I made that last one up but all the other comments are legit.  And of course the original Team Chicken Pot Pie was on cloud nine.  We'd like to thank my sister for this recipe and for bringing our family happily together on Chicken Pot Pie night.


Crust (you can use a refrigerated crust or this homemade one)
1 egg
1/2 tsp lemon juice
1/4 cup cold water
2 cup flour
1/4 tsp salt
1/2 TBS sugar
1/2 tsp baking powder
1 cup butter flavored shortening

Beat egg, lemon juice and water together in a small bowl and set aside.  Sift flour, salt, sugar and baking powder.  Cut shortening into the flour mixture until mixture is crumbly and shortening is evenly distributed.  Combine the egg, lemon juice and water mixture with the flour mixture, until  mixed well.  I think it's easier to use my hands to mix it up.  Divide into two balls.  Roll each out into a circle, about ten inches wide.  Place one crust in the bottom of a greased 9 inch pie pan.

Filling
1 rotisserie chicken*, meat removed and shredded
1 cup sliced carrots
1 cup frozen green peas
1/2 cup sliced celery
2 potatoes, diced
1/3 cup butter
1/3 cup chopped onion
½ cup all-purpose flour
1/2 teaspoon salt
1/4 teaspoon black pepper
1/4 teaspoon celery seed
1 tsp dried thyme
1 tsp dried parsley
2 cups chicken broth
1 cup milk
1 egg

*Rotisserie chicken is definitely the best but I've used regular chicken breast if I don't have a rotisserie chicken on hand and it turned out good as well.

Preheat oven to 375. In a saucepan, combine carrots, peas, potatoes and celery. Add water to cover and boil for 15 minutes. Remove from heat, drain and set aside. In the saucepan over medium heat, cook onions in butter until soft and translucent. Stir in flour, salt, pepper, thyme, parsley and celery seed. Slowly stir in chicken broth and milk. Simmer over medium-low heat until thick. Remove from heat and add shredded chicken and veggies. Mix together then pour into pie crust. Cover with top crust, seal edges, and cut away excess dough. Whisk egg then brush on top of crust. Make several small slits in the top to allow steam to escape. Bake in the preheated oven for 45 minutes, or until pastry is golden brown and filling is bubbly. Cool for 10 minutes before serving

Source: Whisked Away

Wednesday, May 13, 2015

Garden Fresh BBQ Chicken Wrap


Salad season is in full swing!  A few weeks ago I came across this recipe for Smoked Turkey Cobb Wrap.  After wiping the drool off my computer screen, I had a light bulb moment.  Turn your favorite salad into a wrap!  My mind immediately raced to this beloved BBQ Chicken Salad recipe.  I knew it would be the perfect candidate for the transformation.  It's filling, full of flavor and packed with garden fresh goodness.  Perfect for a quick lunch or light summer dinner.  This one will definitely be put on repeat along with the Smoked Turkey Cobb Wrap!

For the chicken:
2-3 boneless, skinless chicken breasts
3 Tbsp olive oil
1 tsp chili powder
1/2 tsp onion powder
1/2 tsp. garlic powder
1/2 tsp. dried oregano
1 tsp salt
dash of cayenne pepper
1 cup barbecue sauce

Mix olive oil and seasonings in a large ziploc bag. Add raw chicken and coat evenly. Heat skillet over medium-high heat and coat with cooking spray. Place chicken breasts in skillet and cook for 7 minutes. Turn chicken and cook an additional 7 minutes, or until cooked through. Pour half of BBQ sauce over chicken. Turn chicken over, and pour remaining sauce over the other side. Cook 2-3 minutes more while flipping the chicken and basting with additional sauce if necessary. Remove chicken to cutting board and shred into large chunks then set aside to cool.

For the Wrap:
6 tortilla wraps
mixed salad greens
cilantro, chopped
corn
black beans
Tomatoes, sliced
Avocado, sliced
Cooked BBQ chicken (see above), sliced
BBQ sauce
Ranch dressing

Lay out wrap.  Put 1-2 large handfuls of salad greens on the wrap.  Top each serving with corn, black beans, tomatoes, avocado, BBQ chicken, cheese and tortilla strips.  Drizzle with ranch dressing and BBQ sauce.  Roll up and secure with a toothpick.  Repeat for each wrap.

Saturday, May 9, 2015

Grilled Chicken Margherita Pizza


I have to confess, I have an addiction.  I'm totally addicted to Naan bread pizza.  They are so quick and easy to make and the Naan bread is the perfect chewy crust.  This Prosciutto, Blackberry & Basil Pizza can be credited with starting this love affair and have been experimenting since then.  This Grilled Chicken Margherita Pizza is a real winner.  Simple, flavorful and perfect fora quick lunch of dinner.  You'll definitely want to try this.  Be warned though, you might get addicted.

Grilled Chicken:
1 large boneless chicken breast
salt & pepper
Roasted Cherry Tomatoes:
1 pint of cherry tomatoes
1 teaspoon of olive oil
salt & pepper
Remaining Ingredients:
2 whole wheat naan flatbreads
2 tablespoons of olive oil
1 garlic clove, minced
1 cup of mozzarella cheese
½ cup of fresh basil, chopped

Instructions
Preheat oven to 400.  Slice cherry tomatoes in half.  Put in a bowl and toss with olive oil, salt and pepper.  Place tomatoes on an oiled baking sheet and roast for 20 minutes.  In the meantime, season 1 large boneless chicken breast with salt & pepper.  Place on a medium high grill and grill each side for 5-7 minutes, or until cooked through.  Remove from grill and let rest, slice into thin pieces once chicken has cooled enough to touch.  When the tomatoes are done, change oven temperature to 350.  Place 2 whole wheat naan flatbreads on a baking sheet.  Evenly spread the following between the two naan flatbreads, 2 tablespoons of olive oil, 1 minced garlic clove, 1 cup of mozzarella cheese, sliced chicken breast, and roasted cherry tomatoes.  Bake pizzas for 8-10 minutes, until cheese is melted.  Remove from oven and sprinkle ½ cup of fresh chopped basil between the two pizzas.  Serve!


Source:  Joyful Healthy Eats

Tuesday, May 5, 2015

Skinny Orange Chicken


I love a good homemade Chinese dinner.  It always tastes better than takeout and can be made with a lot less calories.  One of our favorite family dinners is Sweet and Sour Chicken and I've been excited to try this new Skinny Orange Chicken.  It's full of flavor, quick and easy to make and will definitely be revisited often.

Ingredients
For the Chicken:
2 lb. boneless skinless chicken, cut into small chunks
salt and pepper
2 Tbsp. olive oil
orange chicken sauce (see below)
toppings: thinly-sliced green onions, toasted sesame seeds, orange zest

For the Orange Chicken Sauce:
3 cloves garlic, minced
1/2 cup orange juice
1/2 cup honey
1/3 cup soy sauce
1/4 cup rice wine vinegar
3 Tbsp. cornstarch
1/2 tsp. ground ginger
1/2 tsp. white pepper
zest of one orange
pinch of crushed red pepper flakes

Directions
For the Chicken:
Season chicken generously with salt and pepper.  Heat oil in a large saute pan over medium-high heat. Add chicken and saute for about 4-6 minutes, stirring occasionally, until the chicken is browned and nearly cooked through.  Pour in the orange chicken sauce, and stir to combine. Let the sauce come to a boil, then boil for an additional minute or two until thickened. Remove from heat and serve immediately over quinoa or rice. Garnish with green onions, sesame seeds and additional orange zest.

For the Orange Chicken Sauce:
Whisk all ingredients together until combined. If you would like the sauce to be even sweeter, add an extra 2-4 tablespoons of honey.

Source:  Gimme Some Oven 

Sunday, May 3, 2015

Oriental Grilled Chicken Salad


I love this time of year!  The weather is getting warm, flowers are blooming and all the brown is turning to green.  It's the perfect time of year to start breaking out the salad recipes for a delicious, light dinner.  We recently had a women's activity at church and they had all these amazing salads for dinner.  This was one of my favorites.  I got the recipe and made it for dinner tonight and everyone loved it!  Well, everyone that normally loves salad.  My two non-salad eaters enjoyed a PBJ sandwich, as usual.  They have no idea what they are missing out on.  The rest of us didn't mind though because that meant more for us.

Dressing:
½ cup white vinegar
1 cup white sugar
1 TBS sesame oil
1 tsp salt
½ tsp black pepper
1 cup olive oil

Put sugar and vinegar in blender. Blend at low speed. While blending, add salt, pepper, and sesame oil. Turn the blender to high and gradually add the olive oil.

Salad:
2 heads romaine lettuce, washed and cut into bite size pieces
1-2 chicken breasts, grilled and cut into thin strips
½ red pepper, cut into strips
½ small red onion, cut into thin strips
1 can mandarin oranges, drained
2 or 3 handfuls of fried wonton strips
1 handful of caramelized almonds*

Put lettuce in salad bowl. Top with chicken pieces, red pepper, onion, and mandarin oranges. Just before serving, add the wonton strips and almonds. Pour dressing on top and serve. Do not toss!

* You can buy caramelized almonds, but I prefer to make them.  I think they taste better, are cheaper and super easy to make.  To make your own caramelized almonds, put 1 cup almond sliver and 1/2 cup white sugar in a small frying pan.  Heat over high heat, stirring constantly.  It won't look like anything is happening, but keep stirring.  After about two minutes, the sugar will suddenly turn caramel like.  Stir until almonds are evenly coated then remove from heat.  Pour out onto a greased sheet of parchment paper.  Spread out so that it is a thin single layer and let it cool while you make the salad.  When cooled, crumble over salad.  If you haven't eaten them all before then :)

Source:  Seidi Bennett

Monday, April 27, 2015

Honey Lime Chicken Enchiladas


I've shared some recipes on here that were a product of a Cook Off we've hosted.  Well, here's another one.  Cook Off recipes are the best because everybody brings their A game.  The theme for this Cook Off was Mexican food and I think I ate my weight in food that night.  It was heavenly.  I've had many enchiladas in my day but this one knocked my socks off.  The honey brings a hint of sweet to the dish and then the lime comes in and knocks it out of the park!  I went back for seconds and possibly thirds.

Ingredients
6 T Honey
5 T Lime Juice
1 T Chili Powder
1/2 tsp Garlic Powder
2 lbs chicken, cooked and shredded
10-12 Flour Tortillas
3 cups Monterey Jack Cheese, shredded
16 Oz Green Enchilada Sauce
1 Cup Heavy Cream
optional toppings - avocado, tomato, olives, sour cream, shredded lettuce

Directions
Mix the first four ingredients and toss with shredded chicken.  Let it marinate for at least 1/2 hour.  Pour about 1/2 cup enchilada sauce on the bottom of a 9X13 baking pan.  Fill flour tortillas with chicken and shredded cheese, saving about 1 cup of cheese to sprinkle on top.  Mix the remaining enchilada sauce with the cream and leftover marinade.  Pour sauce on top of the enchiladas and sprinkle with cheese.  Bake at 350 for 30 minutes until brown and crispy on top.  Serve with any optional toppings you'd like.


Source:  Candice Nielson

Sunday, April 19, 2015

One Pan Balsamic Chicken and Veggies


I love the idea of only getting only one pan dirty when I make dinner.  Who doesn't love minimal dinner clean up?  This Italian One Pot Wonder is a favorite one pot recipe.  When I came across this One Pan Balsamic Chicken and Veggies recipe, I knew we'd be good friends.  Instead of pasta, this recipe uses vegetables as a base, so makes for a lighter meal.   The recipe calls for fresh asparagus but fresh green beans work well too.  I like a lot of sauce, so I actually doubled the sauce.  If you're a saucy kind of person, I recommend doubling it for lots of flavor.  This is a quick and easy to make and clean up.  Oh, and it tastes fabulous too!

Ingredients
1/3 cup light Italian salad dressing
2 Tbsp balsamic vinegar
1 1/2 Tbsp honey
1/8 tsp crushed red pepper flakes
1 1/2 lbs chicken breast, cut into strips
2 Tbsp olive oil
Salt and freshly ground black pepper
1 lb fresh asparagus
1 1/2 cups matchstick carrots
1 cup grape tomatoes

Directions
In a mixing bowl whisk together salad dressing, balsamic vinegar, honey and red pepper flakes, set aside.  Heat olive oil in a 12-inch skillet over medium-high heat. Season chicken with salt and pepper to taste, then place chicken evenly in skillet. Cook about 6 - 7 minutes, rotating once halfway through cooking, until chicken has cooked through.  Meanwhile, trim asparagus of tough ends and cut and tomatoes in half.  Add half the dressing mixture to skillet and rotate chicken to evenly coat. Remove chicken from skillet and set aside. Add asparagus and carrots to skillet, season with salt and pepper to taste and cook, stirring frequently, until crisp tender, about 4 minutes.  Put meat back in the skillet with the veggies.  Pour remaining dressing over meat and veggies.  Stir gently to coat and cook for another minute.  Remove from heat and serve warm.

Source:  Cooking Classy

Sunday, April 12, 2015

BBQ Chicken Bundles


We love ham and cheese melts for a quick meal.  I had some leftover shredded BBQ chicken in the fridge the other and decided to see what I could make with it.  A light bulb came on and I decided to make a new version of an old favorite.  And that is how these cuties came to be.  They are a great quick meal, can be served as an appetizer or snack and go perfectly with a bowl of soup.  They are a hit with kids and adults alike!

Ingredients
1 can crescent roll dough
2 cups shredded BBQ chicken
8 small slices mozzarella cheese
BBQ sauce, for dipping

Directions
Preheat oven to 350.  Open crescent roll dough and unroll.  Separate dough triangles.  Place cheese on dough, near the wide end of the triangle.  Add a scoop of chicken on top of the cheese.  Roll up triangle, starting at the wide end.  Place on greased cookie sheet.  Bake at 350 for 15 minutes, until golden brown.  Serve with BBQ sauce for dipping.

Monday, April 6, 2015

BBQ Chicken Stuffed Sweet Potatoes


There are two things I keep professing my love to on here - BBQ and Sweet Potatoes.  When I came across this recipe, it was like the heavens opened up and angels started singing.  I think this one was made just for me.  I had made some BBQ Chicken Quesadillas the other day and threw some extra chicken in the crock pot so I could make this dish.  I've been so excited to try it!  It was SO easy to make and that first bite was everything I dreamed it would be!  The recipe blog I found it on warned me that I'd be dreaming about it for weeks after.  They weren't kidding.  I'm adding it to my menu for next week again!

Ingredients
2 sweet potatoes
1 tbsp olive oil
coarse sea salt
6 oz chicken breast, cooked and shredded
1/4 cup bbq sauce
1 oz freshly crumbled goat or feta cheese
green onions, sliced for garnish

Instructions
Preheat oven to 400. Use a fork to poke several holes into sweet potatoes. Brush each sweet potato with approx olive oil and sprinkle to coat lightly with sea salt. Wrap in foil and bake for 45-60 minutes, until soft enough to poke easily poke with a fork.  Heat chicken and bbq sauce until warm.  Slice cooked sweet potatoes down the middle. Stuff each potato with half the bbq chicken, then top with cheese and onion. Serve immediately.

Source:  Ari's Menu

Sunday, March 29, 2015

Easy Oven Fajitas


I love fajitas.  And I love finding a delicious recipe for fajitas that frees me up to do other things.  This is a brilliant idea!  Slice up your veggies and meat (you can always do this ahead of time if you know you've got a busy evening ahead of you.  Mix in some seasonings and then throw it in the oven to bake while you cook a side dish, help kids with homework, clean up the kitchen, finish the laundry, play mommy taxi driver, scrub a toilet or kick back and relax for a while.  Take your pick.  Fixing dinner won't have to be on your list though!

Ingredients
Seasoning:
1 TBS chili powder
½ TBS paprika
½ tsp onion powder
¼ tsp garlic powder
¼ tsp cumin
⅛ tsp cayenne pepper
1 tsp sugar
½ tsp salt
½ TBS corn starch
Fajitas:
1 onion
3 bell peppers, any color
1 1/2 lb. chicken breast
2 TBS olive oil
1 lime
8 tortillas
optional toppings - sour cream, guacamole, tomatoes, olives, cheese, cilantro, lime juice

Directions
Preheat the oven to 400 degrees. Mix all of the ingredients for the fajita seasoning in a small bowl and set aside.  Cut the onion and bell peppers into strips. Place them in a 9×13 baking dish. Slice the chicken breast into very thin strips and add it to the casserole dish with the vegetables.  Sprinkle the seasoning over the meat and vegetables. Drizzle the vegetable oil over everything and then use your hands to toss the ingredients until everything is well coated in oil and seasoning. Bake uncovered at 400 for 35-40 minutes. Squeeze the juice from half of the lime over top of the meat and vegetables after it comes out of the oven, stir gently.  Scoop a small amount of meat and vegetables into the center of each tortilla. Top with any additional toppings you'd like.


As a Freezer Meal:
Slice the veggies and chicken.  Place in a gallon sized freezer ziploc bag.  Mix the seasonings together.  Pour olive oil and seasonings into bag.  Seal bag and mix to with hands to coat evenly.  Lay flat in freezer to store.  When ready to use.  You can thaw it and cook according to directions above.  To cook frozen, remove from bag and place in baking dish.  Bake at 375 for 50-60 minutes, until cooked through.

Source:  Budget Bytes

Tuesday, March 24, 2015

{Skinny} Chicken Salad


I don't know about you, but I eat much healthier when I plan ahead.  If I'm hungry and grab whatever is quick and easy, it's usually not so healthy.  If I plan ahead and prepare some healthy snacks and meals to have on hand when hunger hits, it's much easier to stick to healthy eating habits.  This is one of my favorites.  The original recipe is from Jillian Michaels and makes 4 cups.  Each 1/2 cup serving only has 118 calories.  I like to make a double batch and keep the extras in the fridge to pull out for a quick lunch or snack.  You can serve it sandwich style, scoop it up with crackers, roll it up in a leaf of lettuce or eat it just plain.  So many options.  And speaking of options, this recipe is very versatile.  If you're not a fan of the grapes (ahem, Jamie), just leave them out.  Not so fond of the celery?  Replace them with cucumbers.  Cashews are my favorite nut but you can switch them out for another kind if you have a different favorite.  I've listed some optional seasonings that I like to add in (not all at the same time though!).  Play around with it and find the seasonings that do it for you.  Make this salad yours and enjoy a yummy, guilt free, protein packed meal!

Ingredients
1 pound boneless skinless chicken breast, cooked and cubed
1 cup red seedless grapes, cut in half
1/3 cup chopped cashews
1/3 cup non or low fat plain greek yogurt
1 teaspoon honey
1/4 cup celery, chopped
1 tsp cider vinegar
1/4 tsp salt
1/8 tsp ground black pepper
Optional seasonings and herbs:  chili powder, garlic salt, cumin, paprika, green onions, parsley, cilantro

Directions
Put the cubed chicken into a large bowl. Add the grapes and cashews and toss gently to mix the ingredients. In a small bowl, stir together the yogurt, celery, honey, vinegar, salt, and pepper. Pour the dressing over the chicken and stir gently to coat. Season to taste.  Store the salad in a tightly sealed container in the refrigerator.

Source:  Cassie Cakes

Sunday, March 22, 2015

Grilled Balsamic Chicken and Veggies with Creamy Tomato Pasta


This recipe brings together three different elements that combine to create a fabulous, "wow" induced dish.  First, you start with the chicken.  The marinade is made with balsamic vinegar and the perfect herb concoction.  You can grill or broil the chicken after marinating it.  I like to broil it because then there's element #2, the veggies.  After broiling the chicken, I like to put the sliced peppers and mushrooms on the same pan that the chicken was cooked in.  As the veggies are roasting, they soak up the balsamic flavor from the chicken infusing them with flavor.  And then, last but not least, everything comes together to top off element #3, the Creamy Tomato Pasta.  This pasta is easy to throw together and so creamy and flavorful, it could stand alone.  But when you top it off with the grilled veggies and chicken, it will make you and your dinner guests say, "Wow!".

For the chicken:
2 Tbs chopped parsley
2 tsp chopped rosemary
2 tsp chopped thyme
1 tsp dried sage
3 cloves garlic, minced
1/4 cup olive oil
1/4 cup balsamic vinegar
salt and pepper to taste
1 1/2 pounds skinless, boneless chicken breasts

In a blender combine the parsley, rosemary, thyme, sage, garlic, oil, vinegar and salt and pepper. Blend together then place chicken in a large Ziploc bag and marinate at least 2 hours or up to 48 hours. Preheat grill to medium high heat or set oven to broil. Remove chicken from dish and grill or broil for about 6 to 7 minutes per side, or until chicken is cooked through and no longer pink inside.

For the Veggies:
1 cup bell peppers, any color
1 cup mushrooms

Slice up peppers and mushrooms.  Grill or broil, until soft.  If you broiled the chicken, put veggies on the same pan that the chicken was cooked on.  Broil for about 5 minutes then stir and flip over, broil for 5 more minutes.

For the pasta:
2 cans (14.5 oz each) Italian diced tomatoes
2 garlic cloves, minced
1 Tbs olive oil
1 cup whipping cream
2 Tbs tomato paste
1/4 cup fresh Italian parsley, chopped (plus extra to garnish)
Salt and pepper to taste
parmesan cheese, to garnish
3 cups cooked fettuccine noodles

Puree diced tomatoes in blender. Sauté garlic in olive oil for 2-3 minutes. Add tomatoes to pan. Add whipping cream, tomato paste, parsley, salt and pepper. Bring to a boil, then simmer for 10-15 minutes.  Pour over cooked noodles, mix gently.

To Serve:
Put pasta on plate.  Place a scoop of grilled veggies on the pasta.  Slice the chicken up and place on top of the veggies.  Garnish with shredded parmesan cheese and parsley.  Serve immediately.

As A Freezer Meal:
Make the marinade for the chicken.  Put the chicken in a gallon sized freezer ziploc bag.  Pour marinade over chicken and seal bag.  Place sealed bag in a gallon sized freezer ziploc bag.  Chop veggies and put in a sandwich sized ziploc bag.  Place in gallon sized bag that the sealed bag of chicken is in.  For the tomato sauce, puree diced tomatoes in blender.  Saute garlic in olive oil for 2-3 minutes.  Add pureed tomatoes to pan.  Add whipping cream, tomato paste, parsley, salt and pepper.  Stir until well mixed.  Remove from heat and let it cool.  When cooled, put in a gallon sized freezer ziploc bag.  Add to the gallon sized bag that had the bag of chicken and bag of veggies.  Seal bag that will now have three separate bags in it and lay flat in freezer.  When ready to use, thaw and cook chicken and veggies as directed.  Heat sauce in a pan on the stove top.  Stir often to mix well.  Cook pasta and serve as directed.

Source: Whisked Away

Wednesday, March 18, 2015

Sweet & Sour Chicken {+Skinny Version}


Every recipe I post on here is one we love.  This one right here is the top of the top though.  I don't even remember exactly where I got this recipe from.  I have very distinct memories of trying to figure out how to make it in one of our first apartments we lived in as newlywed college students.  I have made it countless times since then.  Our kids have grown up with it and when I ask, "What do you guys want for dinner?", this is easily the most requested meal.  Before I discovered this recipe, I used to love ordering Sweet and Sour Chicken when we'd go out for Chinese food.  Honestly, I never do now because this stuff is SO much better!  The crispy breaded coating isn't too thick but adds a the perfect amount of crunch to each bite.  And the flavor of the sauce is just what sweet and sour sauce should be.  I always double the sauce from the original recipe (it's written out as I make it below, so no need to double) because I like to have lots of sauce to pour over the rice or serve on the side as a dip for egg rolls.  As perfectly delicious as this meal is, it's not exactly the healthiest dish.  As I'm getting older and my metabolism is slowing down, I knew I had to come up with a "skinnier" version if wanted to keep eating it like I did 15 years ago.  I've found a solution that drastically reduces the calories yet delivers the beloved sweet and sour taste.  Now when I make this meal, I cut up one chicken breast and put it right in the cooking dish.  I cut up, dip and fry the rest of the chicken and put them in the baking dish with the "naked" chicken.  Pour the sauce over all of it and bake it as directed.


I'll be the first to admit that the skinny chicken isn't exactly the same as the original.  You just can't beat the original.  I usually sneak a piece or two of the crusted chicken but eating a serving of the skinny version leaves me feeling totally satisfied and so much healthier.  You're getting the exact same sweet and sour flavor with the sauce so I totally get my S&S fix.


This is a great meal to prepare ahead of time if you know you're going to have a busy night.  I do everything up to the point of baking it and then put it in the fridge.  When it's almost time for dinner, I pull it out of the fridge and stick it in the oven to cook, as directed.  Whether you mak the original recipe, the skinny version or a mix of the two, you MUST try this.  I'll bet it'll become a family favorite for you too!

Ingredients
Chicken:
3 pounds boneless, skinless chicken breasts
1 cup flour
1 cup cornstarch
salt and pepper
1/2 cup vegetable oil

Sweet and Sour Sauce:
1/2 cups white sugar
2/3 cup chicken broth
2/3 cup ketchup
2 1/2 TBS soy sauce

Directions
Original Recipe:
Preheat oven to 350.  Cut chicken into strips or large chunks.  Mix flour, cornstarch, salt and pepper in gallon sized ziploc bag.  Place chicken strips in bag and coat evenly with flour mixture.  Heat oil in deep frying pan over high heat.  When oil is hot, put coated chicken in oil, one at a time until pan is full (it usually takes two rounds of cooking for me to get all the chicken in).  Cook on one side until crispy and golden brown, about 2-3 minutes.  Turn chicken over and cook until other side is crispy and golden brown.  Place in a baking dish.  In a separate bowl, mix all the ingredients for the sauce.  Pour sauce over the chicken.  Cover baking dish with tin foil and bake at 350 for 45 minutes.  Serve over rice.

Skinny Version:
Cut chicken breasts into strips or large chunks and place in baking dish, sprayed with non-stick cooking spray.  In a In a separate bowl, mix all the ingredients for the sauce.  Pour sauce over the chicken.  Cover baking dish with tin foil and bake at 350 for 45 minutes.  Serve over brown rice.

As a Freezer Meal:
You can also prepare this as a freezer meal.  Place skinny or fried chicken (once it's cooled) and sauce into a gallon sized, freezer ziploc bag.  When you're ready to use it, thaw, put in a baking dish and bake as directed.

Friday, March 6, 2015

BBQ Chicken Apple Pizza


I'll admit, this one kind of sounds a little out there.  Who puts apples on pizza?  The pull of the BBQ sauce (if you know me at all, you know I'm a sucker for the BBQ thing), was enough for me to push aside my skepticism and give this recipe a try.  I decided to pan sear the chicken in BBQ sauce and then cut it into slices, rather than shred it.  Slather the chicken in BBQ sauce, throw in some cheddar cheese, red onion, apples (yes, the apples are totally working) and sprinkle in a little cilantro.  And there it is.  Oh. My. Yum.  I love this pizza in every way!  I think it may be my new favorite.

Ingredients
1 uncooked pizza crust*
1 large chicken breast
2 cups BBQ sauce, divided
2 cups cheddar cheese, shredded
1 apple, thinly sliced
1/2 red onion, sliced into rings
1/4 cup chopped fresh cilantro

Directions
I always use my favorite homemade pizza crust* but you can use a store bought crust if you want.  (These directions are for the homemade crust.  Follow the baking directions that come with your crust, if you choose to use something else.)  Preheat oven to 500.  Place pizza stone (best choice) or pan in oven to preheat with the oven.  Meanwhile, heat skillet over medium-high heat and coat with cooking spray. Place chicken breasts in skillet and cook for 7 minutes. Turn chicken and cook an additional 7 minutes, or until cooked through. Pour 1/4 cup of BBQ sauce over chicken. Turn chicken over, and pour another 1/4 cup sauce over the other side. Cook 2-3 minutes more while flipping the chicken and basting with additional sauce if necessary. Remove chicken to cutting board and cut into thin slices.  Pour 1/2 cup BBQ sauce over chicken slices, mix gently to coat then set aside.  Roll out pizza dough on parchment paper.  Spread 1 cup BBQ sauce over crust.  Sprinkle cheese evenly over crust and top with chicken, apples, onion and cilantro.  Carefully pull the hot stone or pan out of the oven, slide the parchment paper with the pizza onto the pan. Return to the oven and bake for 10 minutes or until the crust is golden brown.  Brush crust with olive oil right after baking.

*This pizza crust recipe makes enough dough for 2 pizzas.

Source:  Lemon Tree Dwelling

Tuesday, March 3, 2015

Chicken Avocado Lime Soup


Living in the land of neverending snow and ice, I'm always on the look out for a good soup recipe.  There are so many heavy, creamy soups out there that make the perfect ending to any cold winter day.  Don't get me wrong, they are fabulous, but I wanted to find one that tasted amazing but was lighter on the calories.  And then I found this.  Oh, this soup is so perfect in every way.  The chicken broth is light and savory, the lime adds a little zip and the buttery avocados mix perfectly with the cilantro.  You can keep it light or, for a few more calories, add some optional toppings.  This soup is filling, light and full of flavor and is going to be enjoyed year round.

Ingredients
2-3 chicken breasts, cooked and shredded
1 Tbsp olive oil
1 cup chopped green onions
2 cloves minced garlic
7 cups chicken broth
2 Roma tomatoes, seeded and diced
1/2 tsp ground cumin
Salt and freshly ground black pepper
1/3 cup chopped cilantro
3 Tbsp fresh lime juice
3 medium avocados, peeled, cored and diced
Optional toppings - tortilla chips, shredded cheese and sour cream

Directions
In a large pot heat 1 tablespoon olive oil over medium heat. Once hot, add green onions and garlic and saute for a couple of minutes.  Add chicken broth, tomatoes, cumin, salt, pepper and shredded chicken.  Stir well and simmer for about 10 minutes.  Stir in cilantro and lime juice. Add avocados to soup just before serving (if you don't plan on serving the soup right away, I would recommend adding the avocados to each bowl individually, about 1/2 an avocado per serving). Serve with tortilla chips, cheese and sour cream, if desired.

As a Freezer Meal
Prepare as directed, leaving out the avocados.  Once it is cooled to room temperature, place in gallon sized, freezer ziploc bag.  When ready to use, thaw soup and reheat in a large pot.  Add in avocados before serving.

Source:  Cooking Classy
Related Posts Plugin for WordPress, Blogger...